1. Read Text File Data of A Small Factory

Text files are the simplest ways to store information. For example, in small factories, every labour’s information is stored in separate text files. All these text files are uploaded on the web server so that the company’s administrators can access them over the internet.
A web developer’s work here, would be to show the labours information in a web page. For this, the developer can simply create a web page, add few divs which will show this information. Then, make an jquery ajax call to these text files using jquery load method. Finally, showing the information inside these divs.
The Code
<script>
    $(document).ready(function () {
        $("#labour").load("Michael-James.txt", function (response, status, xhr) {
            if (status == "error")
                $("#textData").html
        });
    });
</script>
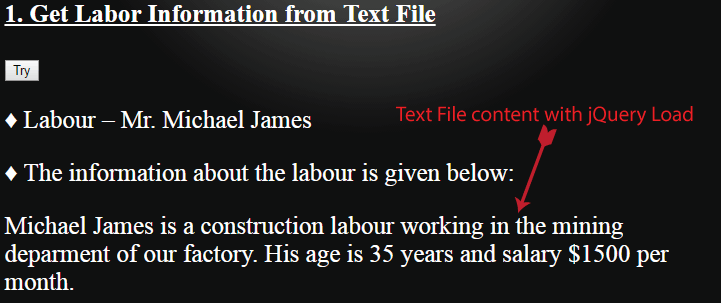
Explanation – In the above web page, we are showing a labour’s (named “Michael James”) information inside a div (with id “labour”). We are calling the jQuery Load method to read the “Michael-James.txt” file. This text file contains the information about the labour.
The jQuery Load method searches this text file in the same folder where the web page is kept.
If the text files are kept in some other location, then give its relative path to the jQuery Load method.
Example – If the text file is kept inside a folder “labourFolder” (which is kept in the root), the jQuery Load syntax will look like:
$("#labour").load("/labourFolder/Michael-James.txt",
function (response, status, xhr) {
    if (status == "error")
        $("#textData").html
 });
2. Get Product Information and Prices from JSON

In the ecommerce world, distributed applications communicate with each other to get updated product prices and information. For example – a big distributer stores the current prices of the products in a JSON file.
This file is very small in size and is sent to the small shop keeper & partners to their email address. Through this JSON file, they can know about the current prices of the distributer’s products.
The job of a web developer, working for the shop keeper, can use the jQuery Load method to fetch this JSON and show the contents inside a web page. This makes it easy for the shop keepers to find out the current prices of the products. (Note that the JSON format is not understandable for a common man).
The Code
<button id="productButton">Try</button>
<div id="productJsonDiv"></div>
<div id="productHtmlDiv"></div>
$("#productJsonDiv").load
("product.json", function (response, status, xhr) {
    $(".displayPara").css("display", "block");
    var json = JSON.parse($("#productJsonDiv").html());
    var table = $("<table><tr><th>Product</th>
    <th>Color</th><th>Price</th></tr>");
    var tr;
    for (var i = 0; i < json.length; i++) {

        tr = $("<tr>");
        tr.append("<td>" + json[i].Product + "</td>");
        tr.append("<td>" + json[i].color + "</td>");
        tr.append("<td>" + json[i].Price + "</td>");
        tr.append("</tr>");
        table.append(tr);
    }
    table.append("</table>");
    $("#productHtmlDiv").html(table);
    if (status == "error")
        $("#textNoData").html
        ("Error: " + xhr.status + ": " + xhr.statusText);
});
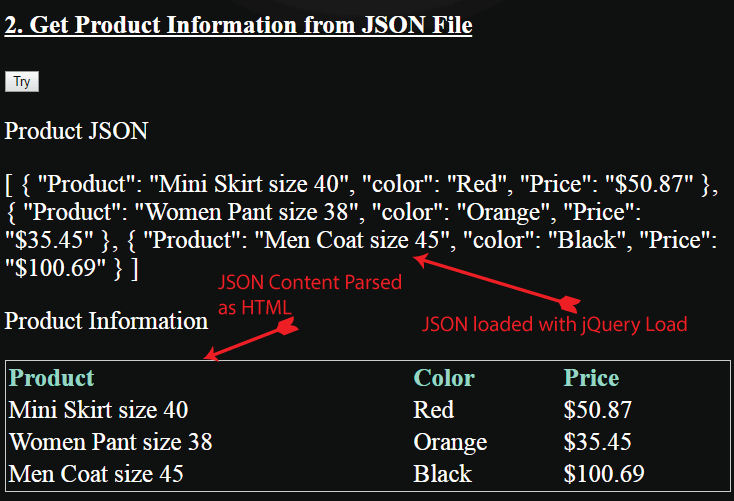
Explanation – On the button “productButton” click event, the jQuery Load fetches the product JSON file. Once the JSON is fetched, it is parsed to HTML and shown in the table form, on the web page.
The products’ information in the table form is very easy to understand for the common man.
Note – In place of JSON, sometimes XML is also used. The above jQuery Load code will work for the XML file too, with few modifications.
3. Read Secure Information from the Database

There should be proper security applied to the websites and jQuery Load works very well in this regard. For example, using jQuery Load, you can authenticate users and provide secured information only to the authenticated users.
Consider a situation – you have a web page where there are two input controls, one for entering username and the other for entering password. Now a user has to enter his username and password them. The system checks his username and password, and only if they are correct, then his secured information is shown to him.
This prevents unauthenticated users from accessing secret information from the database.
This is how we can make the code for this situation.
The Code
<input id="usernameInput"

type="text" placeholder="username" />
<input id="passwordInput"

type="text" placeholder="password" />
<button id="databaseButton">Try</button>
<div id="databaseDiv"></div>

$("#databaseButton").click(function (e) {
    $("#databaseDiv").load("result.aspx #dbInformation",
    { "username": "" +
$("#usernameInput").val() + "",
"password": "" +
    $("#passwordInput").val() + "" },
function (response, status, xhr) {
        if (status == "error")
            $("#databaseDiv").html("Error: " +
            xhr.status + ": " + xhr.statusText);
    });
});
Explanation – We are passing the input values to a server side page “result.aspx” and we are loading this server side page’s “#dbInformation” through the jQuery Load method (“dbInformation” is a div in the server page).
All this is done from just a single line code.
Now in the server side page “result.aspx”, we are checking the username and password to authenticate the user. If they are correct, only then his secured information is returned.
The code for the result.aspx page is given below:
The Code
<div id="dbInformation" runat="server">
</div>
protected void Page_Load(object sender, EventArgs e)
{
    if (!IsPostBack)
        SearchDatabase();
}
void SearchDatabase()
{
    string username = Request.Form["username"];
    string password = Request.Form["password"];
    if ((username == "admin") &&
    (password == "admin"))
        dbInformation.InnerHtml = "Hello admin,
        <br/>Your secured information is given below.............";
    else
        dbInformation.InnerHtml = "Wrong Username or Password. Try again !";
}
Explanation – This .aspx page has a div with id “dbInformation”. Into this div, we will be putting the secured information after authenticating the user. You may also note that this div’s information is loaded by the jQuery Load method located in the login page.
Isn’t this the blueprint of a very simple and highly secured system?
4. Load Data from External Website like Wikipedia

Some websites show information from an external website like Wikipedia. This feature can be easily created using jQuery Load method.
In the jQuery Load method, pass the URL whose HTML is to be fetched, then send it to the server side page (like .aspx or .php). In the server side page, you fetch the HTML of the url and set in the div. Like what we did before, finally we will show that div’s content.
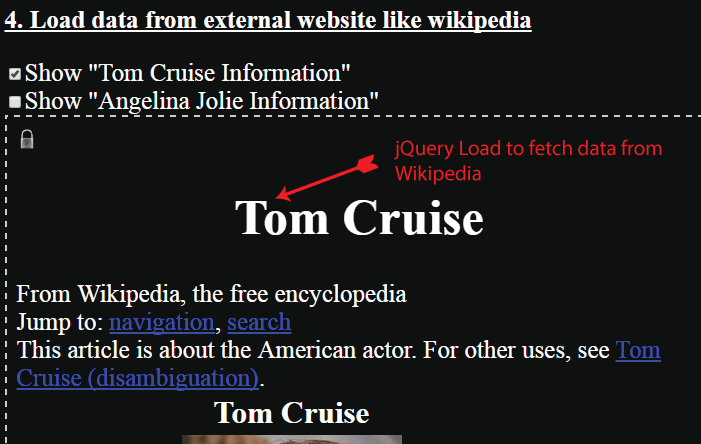
Here, we will be showing this feature in the web page that has 2 checkboxes (for Tom Cruise and Angelina Jolie). On checking any checkbox, the jQuery Load method fetches their information from the Wikipedia page.
The Code
<input type="checkbox"

id="tomCheckbox" /><label>Show
"Tom Cruise Information"</label><br />
<input type="checkbox" id="ajCheckbox" />
<label>Show "Angelina Jolie Information"</label>
<div id="externalWebsiteDiv"></div>

$("input[type=checkbox]").change(function () {
    var checkedValue = $(this).prop("checked");
    $("input[type=checkbox]").prop("checked", false);
    $(this).prop("checked", checkedValue);

    if ($("#tomCheckbox").prop("checked") == true) {
        $("#externalWebsiteDiv").load("result.aspx #wikiInformation",
        { "url": "https://en.wikipedia.org/wiki/Tom_Cruise" },
function (response, status, xhr) {
            if (status == "error")
                $("#externalWebsiteDiv").html
                ("Error: " + xhr.status + ": " + xhr.statusText);
        });
    }
    else if ($("#ajCheckbox").prop("checked") == true) {
        $("#externalWebsiteDiv").load("result.aspx #wikiInformation",
        { "url": "https://en.wikipedia.org/wiki/Angelina_Jolie" },
        function (response, status, xhr) {
            if (status == "error")
                $("#externalWebsiteDiv").html("Error: " +
                xhr.status + ": " + xhr.statusText);
        });
    }
    else
        $("#externalWebsiteDiv").html("");
});
In the server side page, we will fetch the HTML from Wikipedia and set it inside the div.
The Code
<div id="wikiInformation" runat="server">
</div>
protected void Page_Load(object sender, EventArgs e)
{
    if (!IsPostBack)
    {
        string url = Request.Form["url"];
        if (url != null)
            GetWikiData(url);
    }
}

void GetWikiData(string url)
{
    using (WebClient client = new WebClient())
    {
        string htmlCode = client.DownloadString(url);
        wikiInformation.InnerHtml = htmlCode;
    }
}
Conclusion
After reading this tutorial you may have got a good idea about how useful the jQuery Load function is in the web development tasks. There is no AJAX task that cannot be done without this function. Use it to create powerful AJAX features in your websites and web application.
(This article, along with any associated source code and files, is licensed under The Code Project Open License (CPOL))


